


Follow the below steps to create 3D looking cube in photshop.

Step 1. First create a square, fill it with gradient color, use ctl + T for transforming and skew it a little bit so that it looks as shown in step1.

Step 1. First create a square, fill it with gradient color, use ctl + T for transforming and skew it a little bit so that it looks as shown in step1.
Step 2. Duplicate the layer, and flip the side horizontaly using transformatin and place it adjacent to the first side, make sure there is not gap between the two sides, as shown in step 2.

Step 3. Again duplicate the layer and select the distort option in transformation option and fit this side on top of the first two sides, place the corners till it exactly fits the sides of the first two squares as shown in step 3.
Step 4. Merge all three layers (ctrl + E) and blure the joining edges of the sides of the cube so that you get a smooth edge, this step also corrects the gaps that you might have left betweenthe sides, see step 4 image.
Step 5. Now using the magic want select the white portion of the layer, now go the select menu>modify>expand and expand the selection by 5 pixel (assuming your file is 300 x 300
pixels), now again go to select menu>modify>smooth and make the selection smo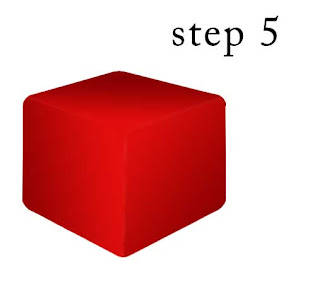 oth by 10 pixles and press delete key to delete the selected part of the layer leaving a smooth edge cube, as shown in step 5 image.
 oth by 10 pixles and press delete key to delete the selected part of the layer leaving a smooth edge cube, as shown in step 5 image.
 Step 6. Now create a' V' shaped object and using gaussian blure create shadow effect under the cube as show in image step 6.
Step 7. Now duplicate the layer that has the cube, and place it below the shadow layer, reduce the opacity of the layer and eraser the bottom portion of the cube using eraser, so that it looks like the relfection of the cube as shown in step 7 image.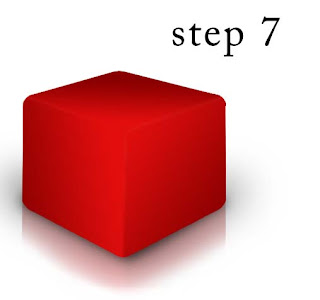

Your 3D cube is now ready, you can add more realistic looks by using dodge tool to the center of the sides and top part of the cube and by using the hue/saturation tool (ctr +U) increase the saturation, so that you get a glowing effect out of the box as shown in the final image.

No comments:
Post a Comment